Showing posts with label Office 365. Show all posts

Wednesday, October 10, 2018

Exchange Hybrid Setup in Office 365 | HCW setup Step by Step

A hybrid deployment is a combination of On-premises Server and and Cloud-based services. The Hybrid Configuration Wizard actually helps you achieve this. You get the seamless look and feel of a single Exchange organization between an On-Premises Exchange organization and Exchange Online in Microsoft Office 365.

Hybrid Configuration Wizard enables the MRS proxy which is required to migrate mailboxes from and to Office 365.

HCW creates the Hybrid Configuration object in your on-premises Active Directory which stores the hybrid configuration information for the hybrid deployment and is updated by the Hybrid Configuration wizard.

Deploying a Hybrid Environment is one of the most complicated tasks during Migration to Office 365. Sometimes it takes weeks to collect data about infrastructure, designing the plan in stages. Even taking every precaution there is no guarantee that everything will turn out fine. I myself have been into situations many times where one single missed out step failed the HCW.

Hence, I would like to share a Step by Step Guide to perform Hybrid Configuration Wizard (HCW):

Step 1: Open Internet Explorer - Login into portal.office.com with Global Administrator - Exchange Admin Center - At Left Bottom corner click Hybrid - Click Configure which will download a file - Run it.  (Note: Don't use Google Chrome, use Internet Explorer)

Step 2: Once you run the setup, it creates a shortcut on Desktop, and the configuration window will open Automatically - click Next.

At this step HCW searches the right Exchange Server in your Organization. It will point to the CAS Server. Click Next.

Step 3: Enter your On-premise Exchange Server Administrator Credentials and the Office 365 Global Administrator Credentials. HCW tries to login into each server using Powershell.

Step 4: Next Steps if Setting Up Federation Trust. Its required for full Hybrid deployment. It enables sharing calendar free/busy information. It will list the domains and you have to prove that you own that. For that a TXT Record you have to add in your Domain DNS Registrar.

Step 5: HCW will ask you to provide the Transport Certificate (3rd Party CA) which will be used to secured Email Flow between On-Premise & Office 365 Tenant.

Step 6: Enter your Public Ip Address. You can use FQDN of the On-Premise Server as well, however it should resolve to your Public Ip address provided by your ISP. The ports 25 (EWS) and 443 (OWA) should be open. Click Next.

Step 7: HCW will start the Configuration Process and will enable your On-premise Exchange Server and Office 365 Tenant into a single Hybrid Organization.

Step 8: Finally if everything went well, you will receive the message Congratulations, Hybrid Services are now configured.......

Friends wasn't that easy? It was :) I have included a Video Presentation just for you:

Now after completing it, most of the Exchange Admins wonder what would have got changed in their infrastructure and how to find that everything is fine.

Look for the logs at the location for any issue:

Location of the Log File:

%AppData%RoamingMicrosoftExchange Hybrid Configuration

Look for the .txt file and search:

Activity=OnPremises Connection Validation
Activity=Tenant Connection Validation

You can check the Hybrid Configuration using Exchange Management Shell: Get-HybridConfiguration

Changes seen at On-Premise Exchange Server:

a) EMailAddressPolicy - an addition with one smtp address "@tenant.mail.onmicrosoft.com"

b) Remote Domain - an addition with tenant.mail.onmicrosoft.com and tenant.onmicrosoft.com

c) Accepted Domain - an addition with tenant.mail.onmicrosoft.com

You can also check the above changes using Exchange Management Shell:

a) EMailAddressPolicy
Get-EmailAddressPolicy | FL Name,EnabledEmailAddressTemplates

b) Remote Domain
Get-RemoteDomain

c) Accepted Domain
Get-AcceptedDomain

To view all data about the Organization Relationship, use your Power Shell console: Get-OrganizationRelationship

Even it looks simple, HCW performs major complicated tasks at the backend for us and we have covered them mostly.

I hope you would have understood how easy it is to setup Hybrid Configuration Wizard. If you find this useful, do let me know by leaving your comment below.

Read More: Click Here

Ajey Kumar Gupta
(Microsoft Exchange Admin)

Next Blog: Google AdSense के अंदर की Terms को समझें | CPC, RPM, AD Units, Monetization etc.

Monday, October 1, 2018

How to create Professional or Business Email Address with MicrosoftOffice 365

Duration to complete: Less than 5 minutes.


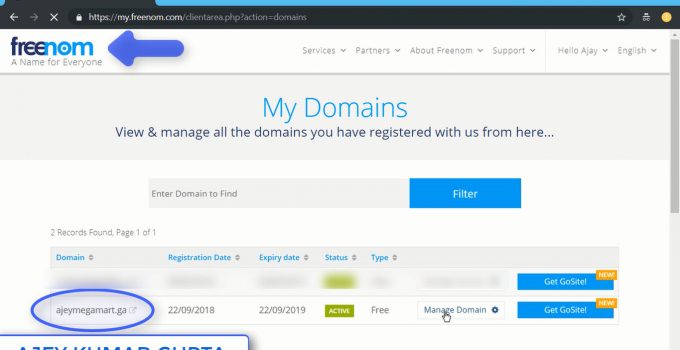
Step1: Own a domain name from Freenom.com. For this blog, I created ajeymegamart.ga domain using with I will create my business Email address like ajey@ajeymegamart.ga.

Step 2: Search Office 365 E5 Trail in Google.com and click on the first link.


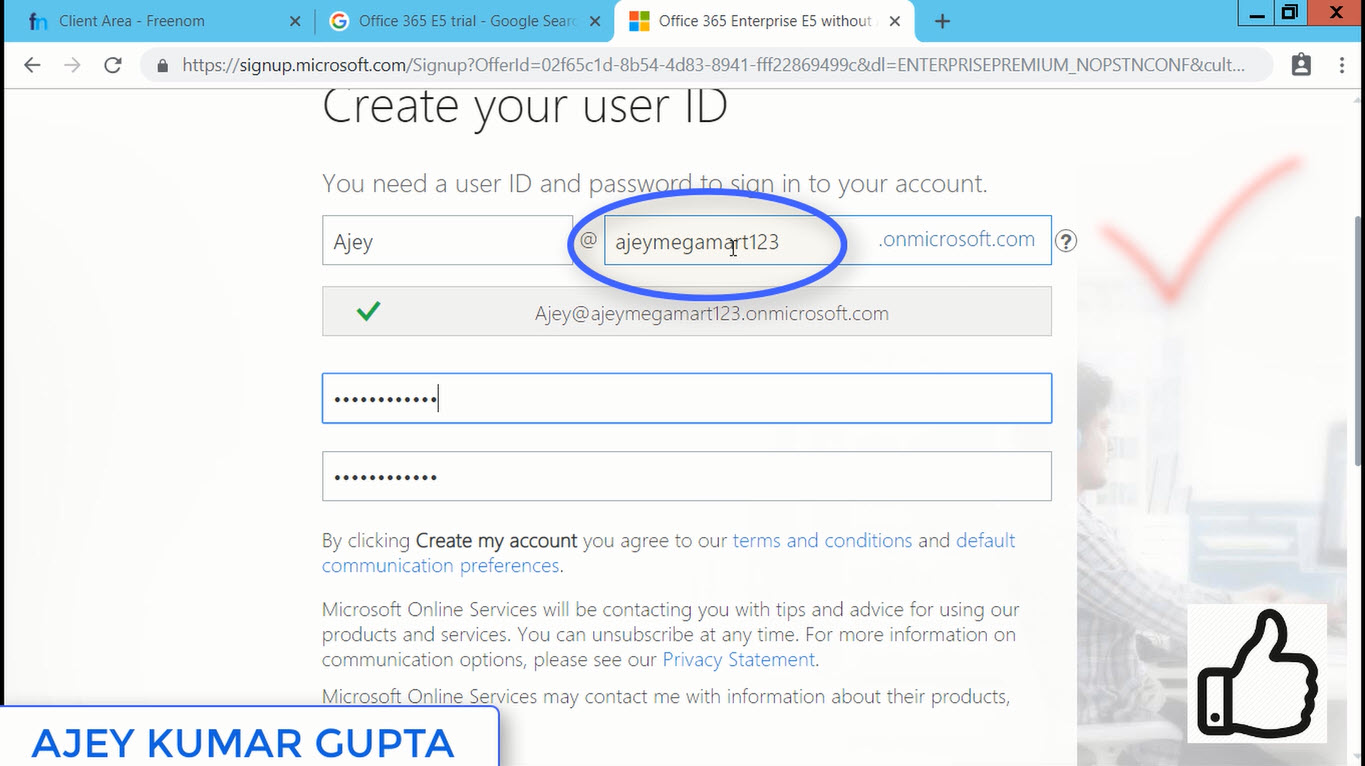
Step 3: Fill out the form. Make sure at this step while adding your business domain, don't add your actual domain name else it will stuck with this particular tenant you are going to create and cannot be removed if you want to use it by creating a new tenant after this. Add your domain name in the form like domain123 e.g., ajeymegamart123


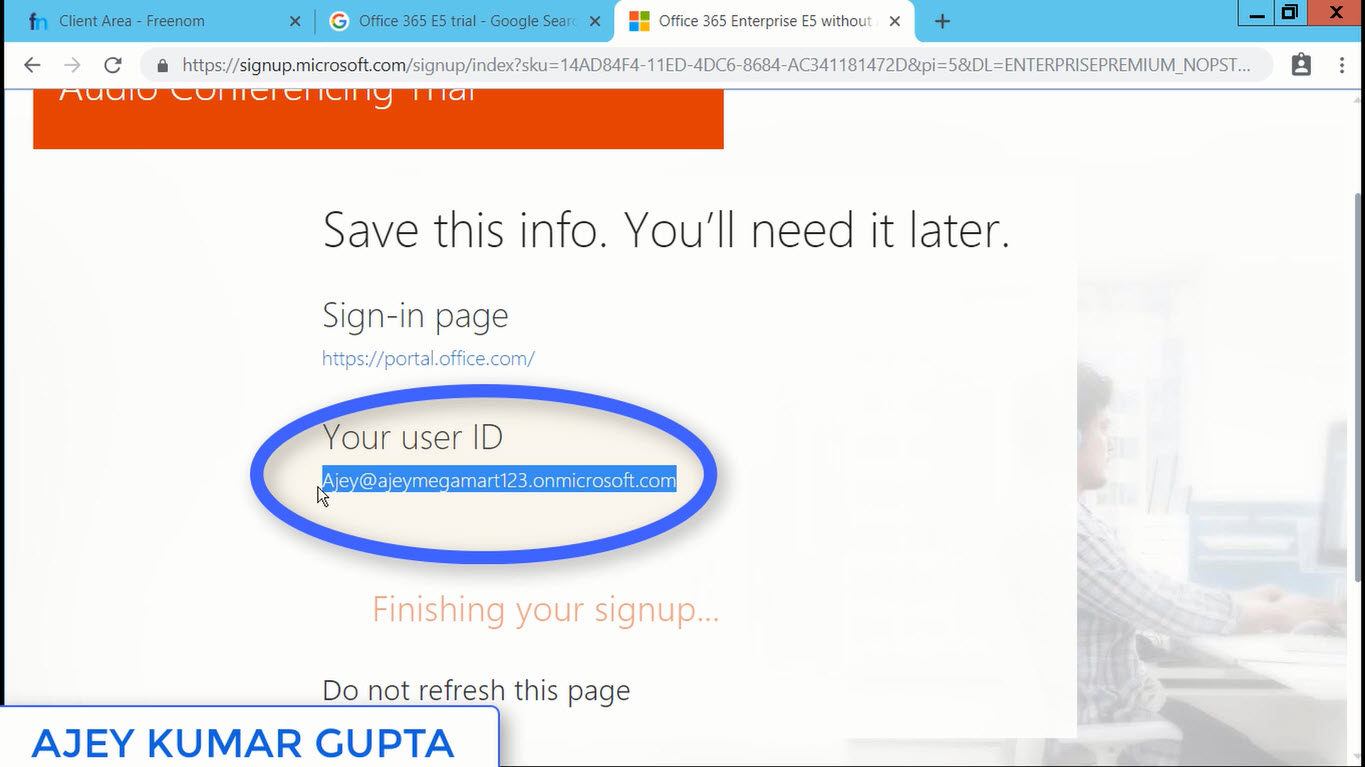
Step 4: After completing the form we will get the first Global Administrator (who has all the rights to administer the tenant) i.e., ajey@ajaymegamart123.onmicrosoft.com 


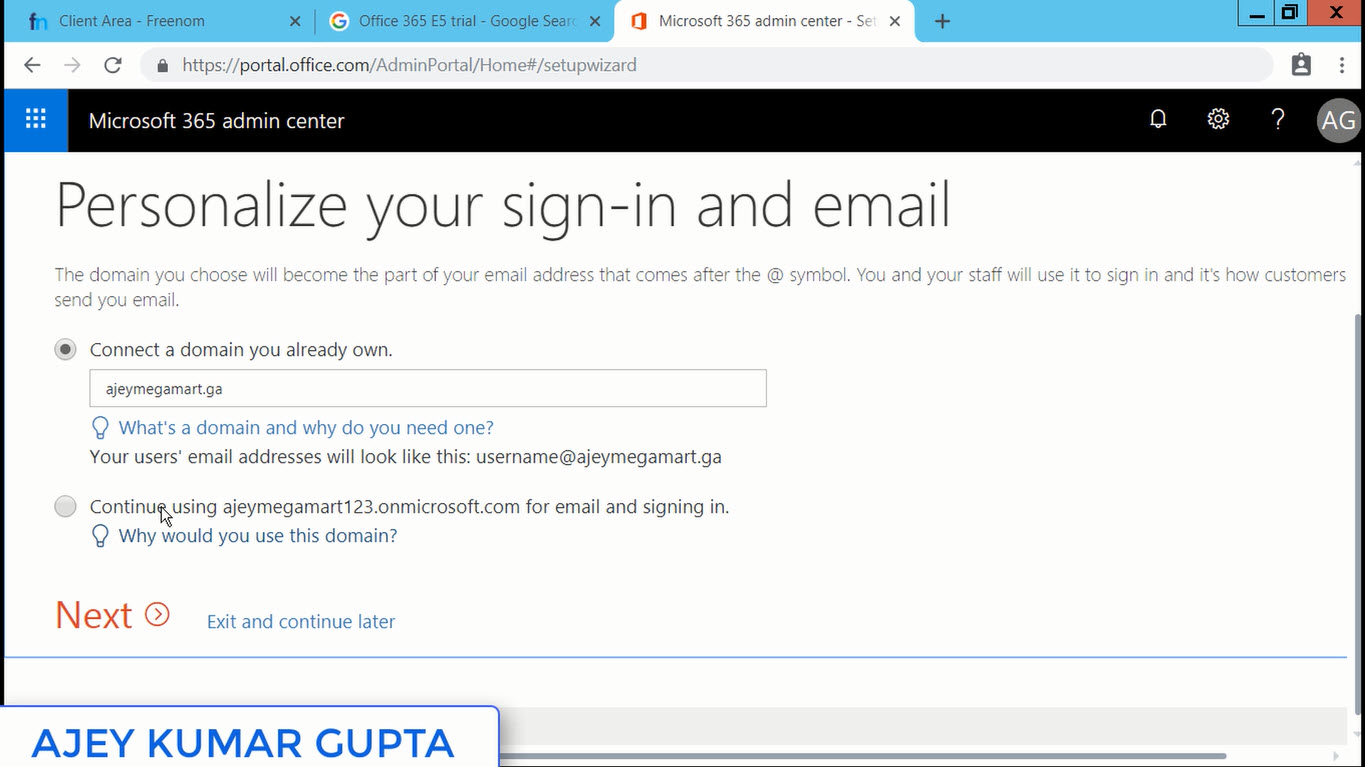
Step 5: Now at this step we will enter our actual domain name i.e., ajeymegamart.ga


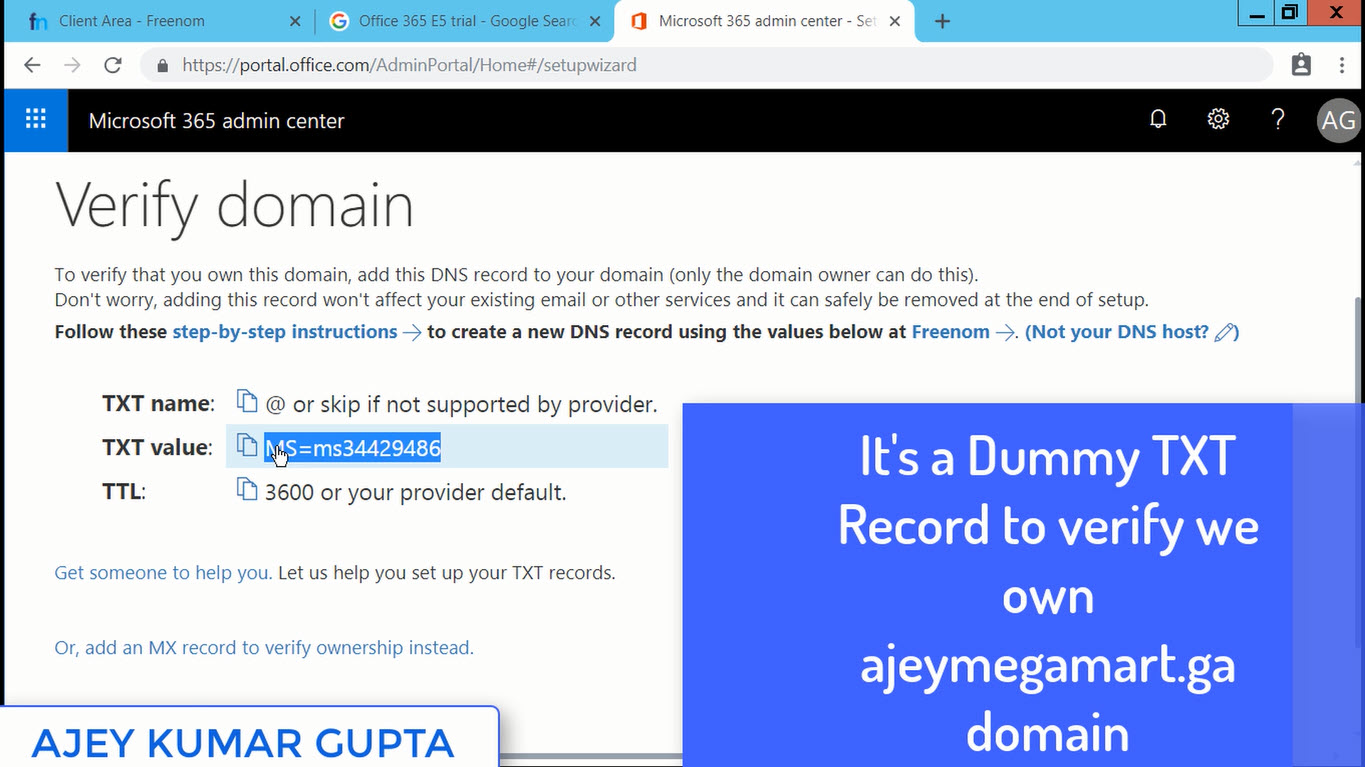
Step 6: Microsoft will ask us to prove that we own this domain ajeymegamart.ga, so for that it provides us a Dummy TXT Record to add  in our Domain Registrar DNS i.e., Freenom.com


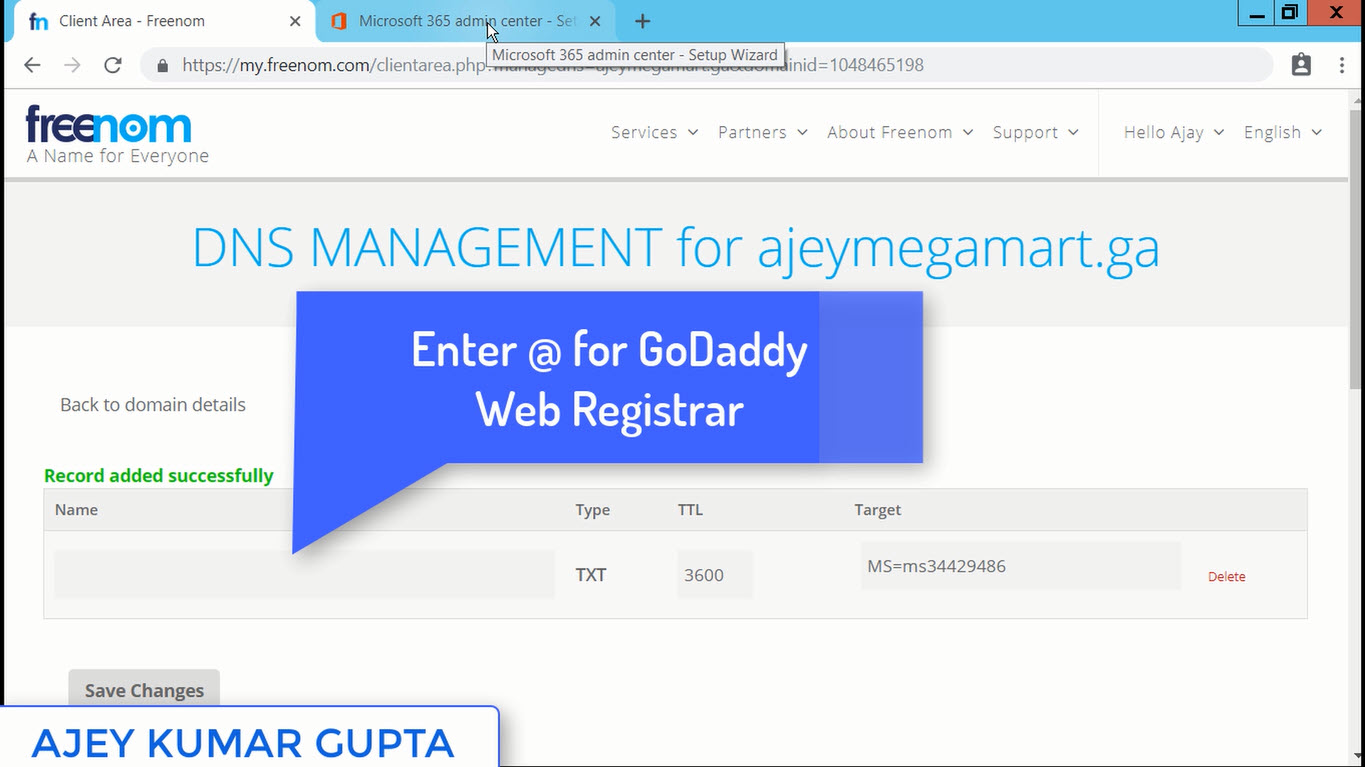
Step 7: Add the TXT Record in the Manage DNS of ajeymegamart.ga Domain at Freenom.


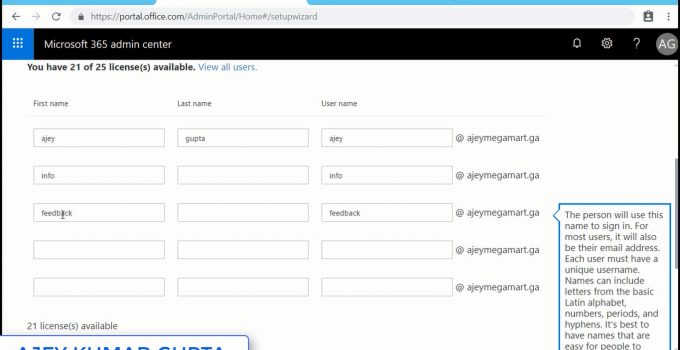
Step 8: Enter the users of your Organization or Business who require the Business Email Addresses to communicate with the clients.


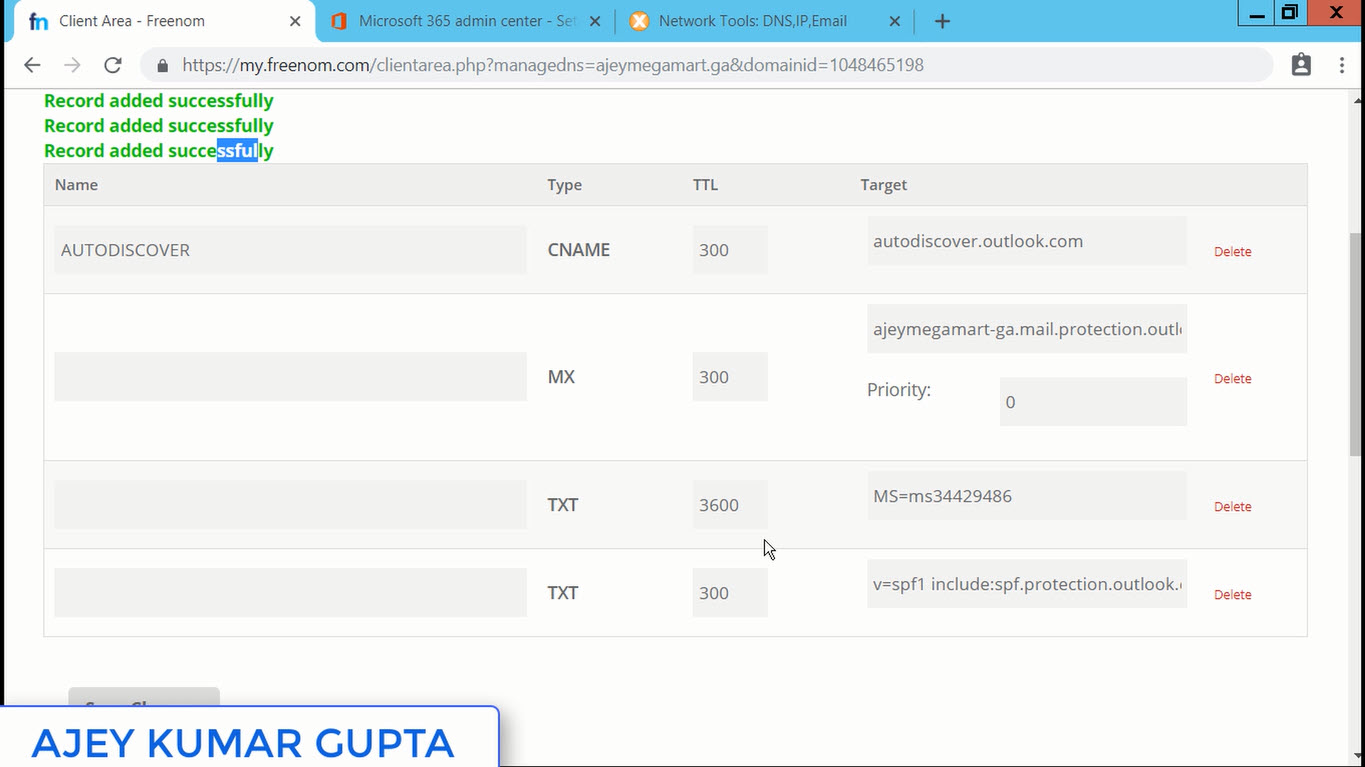
Step 9: After you entered the users, Microsoft will finally provide the real DNS records which will help your domain to get Office 365 Services. Add these in the DNS Section of Domain Registrar.

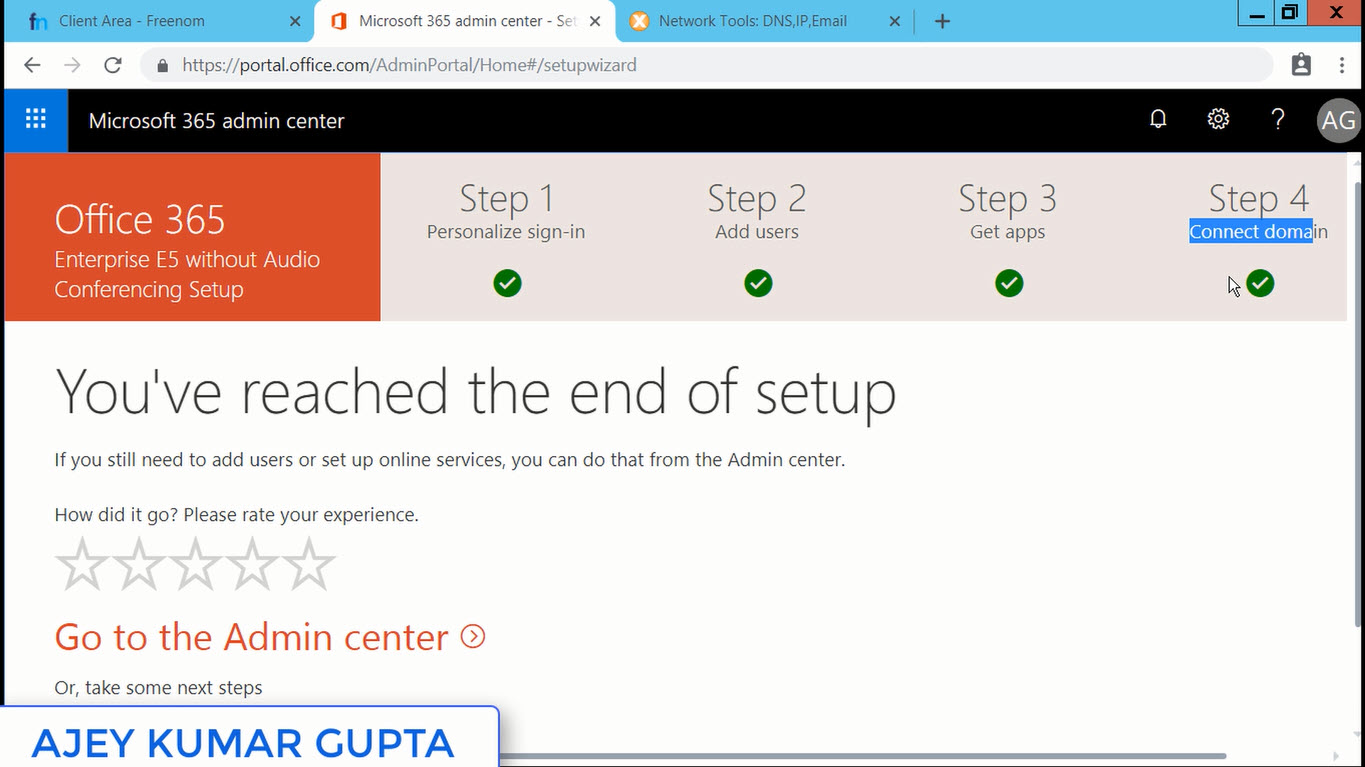
Step 10: The Initial Configuration of your Tenant is completed. Now click on Go To Admin Center.


Step 11:  We created the tenant using ajey@ajeymegamart123.onmicrosoft.com. Now we will log out from this user and login with our user having actual Email address associated with our business domain name. However, before logging out I will ensure that I must reset that user's password manually and assign him Global Administrator Rights.

Step 12: We will log out and login with our real email address i.e., ajey@ajeymegamart.ga

Step 13: We will try to send a test email from Gmail to our business email address. 


Step 14: Congratulations Friends, we have successfully received an email from Gmail. Now anybody in this world, may be our business client or our partner can send us an email on our business Email Address ajey@ajeymegamart.ga

You can share this Email address or get it printed on your Card and it will give a professional look to your profile.

Friends, if we send or receive Emails using our Business Email Address instead of gmail or hotmail, we promote our Business Domain along with our Website. In today's world your clients expect that you should have a website where they can find more about you and can communicate on your Business Email Address.

To get an real experience on all the steps, I am including the live demonstration in the video below. I hope it will give you crystal clear understanding of all the steps:

Read more: Click Here

Thanks a ton for reading my blog. If you have any queries or doubts regarding the steps performed or in the configuration, do post your comments below and I will try to revert asap.

Ajey Kumar Gupta
(Microsoft Exchange Admin)

Next Blog: How to create Premium LinkedInLearning Account Genuinely?

Thursday, September 6, 2018

Azure AD Connect: How data migrates to Cloud?

When migrating to Office 365 environment, most organizations preserve the old on-premises structure. Sometimes it is because the migration process can take quite a bit of time to finish, or may be the company wants to follow the hybrid scenario.


An Easy "Video Tutorial" as an addon is also included in this blog for a live demonstration. However, I recommend you to follow all the steps sequentially mentioned below.

One of the important aspects of the coexistence setup is Synchronization of Active Directory between On-Premise AD and Cloud's Azure AD. It's accomplished using Microsoft's Azure AD Connect Tool:

Microsoft Azure Active Directory Connect Tool:

Its used to sync the On-Premise local AD with the Azure AD Office 365. The program syncs all accounts, with their access passwords up to Office 365. Microsoft recommends installing Azure AD Connect on a member server within a domain, & should not be deployed on a Domain Controller.

Download Azure AD Connect: https://www.microsoft.com/en-us/download/details.aspx?id=47594.

Follow the On-Screen Wizard to install it. Next comes the Configuration which is explained in detail below.

Configuration Of Azure AD Connect Tool:

1) After installation of Azure AD connect tool, open its configuration Wizard and click I Accept the License Terms.


2) Choose Customise in the next Screen.


3) Leave all the default options as it is. Click Next.


4) Here we specify the method used to authenticate users. Here in the lab we will keep it simple and select Password Synchronization and allow password hashes from the local AD to be passed to 365.


6) Add a local Active directory, enter the credentials for a domain admin and press Add Directory.  After that enter the On-premise Administrator Credentials.


7) Here we can leave the defaults as shown but ensure the source anchor is set to objectGUID and the UPN set to userPrincipalName then press Next.


8) The next screen will show all Organizational Units (OU's) of On-Premise Active Directory. Note: The best practice says that we should create one custom Syncing OU and keep all the users to be moved to the cloud in it. Leaving rest intact at on-premise unless specifically required.


9) Keep the default options selected at this step.

11) Make a check on Password Hash Synchronization option (Exchange Hybrid Deployment is optional). There are some great features here that are worth knowing about. Let's take a look at what each of these do just in case you haven’t seen them before:


Exchange hybrid deployment: Used to allow an Exchange hybrid setup but specifically allows some exchange attributes to be synchronized back to the on-premises AD.


Azure AD app and attribute filtering: Used to specify what can and can't sync based on specified attributes.


Password hash synchronization: Allows on-premises AD user password hashes to be synchronized into Office 365. This means users can log into the 365 portal using their local passwords.


Password writeback: Allows passwords to be changed in the 365 portal and then synced back to the on-premises AD.


Group writeback: Allows groups to be created in the 365 portal and then synced back to the on-premises AD.


Device writeback: Allows Azure AD registered devices to be synchronized back into the on-premises AD. This then allows those devices to authenticate with on-premises resources.


Directory extension attribute sync: Allows you to sync custom attributes into 365.


12) Here we select Start the Synchronization Process when Configuration completes. Press Install to continue.


13) Azure AD Connect is configured now to sync objects to Office 365.


14) Press Exit to finish.


We will be adding a new user "Utk100@exolab.tk" in our Server 2012R2 Active Directory and will be using Azure AD connect to sync that user to Azure Active Directory of Office 365 Portal.

Step 1 - Add a user Utk100@exolab.tk at on-premise.


As Utk100@exolab.tk is added into Syncing OU at On-Premise AD, and Azure AD Connect tool will pick it up and sync (add) to cloud. Any users added or removed inside our custom created Syncing OU will replicate in the Azure AD as well.


Step2 - Launch the miisclient.exe program or type Synchronization Service in Search to open Synchronization Service Manager. It displays Import & Export (syncing) of data from On-Premise to cloud. In the upper part of the window, there is a list of all current sync cycles and in lower left, all current modifications to AD are listed.

By default Azure AD Connect syncs any changes after every 30 minutes. As we recently added the user Utk100@exolab.tk, so either we have to wait 30 minutes or we can even force the sync to occur using below Powershell Command.

Start-ADSyncSyncCycle -PolicyType Delta


Now let's see the ADDS option which will show us a new user added to sync.


That newly added user is shown when we click Add 


Step 3: Lets Open Portal.office.com and check when the last sync happened. 1 minute ago means that if we added a user or removed 4 to 5 minutes ago and run the above command, that change should replicate to Azure AD also. Let's check.


Lets finally check the user has synced or not. Open Users - Active Users - search using users display name "Utk100" and Hurray! We are able to find it. Its Sync Type is also "Sync with Active Directory".


I hope it's easy for you to deploy Azure AD Connect Server in your environment keeping the fact to sync only Selected OU's & leaving all Clutter at On-premise.


Read More: Click Here

Thanks a ton for reading my blog. I know its a bit complicated to perform all steps the first time, however, if you follow along with my steps, I can assure you that you will not face any issues syncing on-premise objects to office 365.

If you like my blog, please post your feedback or queries below.

Ajey Kumar Gupta
(Microsoft Exchange Admin).

Next Blog: Why the world’s Top Universities teach Blockchain?

Thursday, August 23, 2018

Why organizations moving to Office 365 prefer MFA for Security?

Why do we use MFA
If by any chance a corporate user's credential are compromised, login to his account will become  impossible until that user approves it from his phone. Hence Microsoft recommends that it should be used in the corporate world for enhanced security. It safeguards corporate data & applications.

Short Steps (takes maximum 1 minute to complete all steps) :

a) Portal.office.com - Users - Active Users - Select the User. Click Manage Multi-Factor Authentication at bottom of the page.
b) Select User - Enable Multi-Factor Authentication - Enabled.
c) Now when the user will try to login, he will be asked to fill his details e.g., mobile number. Educate him in an email about it to choose options like Authentication Phone (best & simplest) or Mobile App (requires Microsoft Authenticator App in Mobile with working internet) - Finish.
d) When user logs out & login, if Authentication Phone is configured, he will receive a simple verification code. If Mobile App is configured, he has to choose Approve or Deny. Selecting Approve will automatically let the user login to his O356 Account.

Practical
a) Login to portal.office.com with your Organization's Credentials.
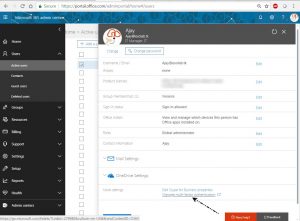
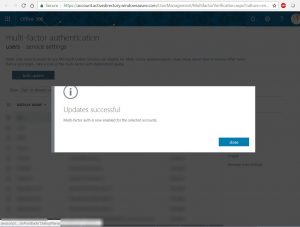
b) Click Users - Active Users - Select the user on which you want to set up MFA. Click Manage Multi-Factor Authentication at the bottom of the page.


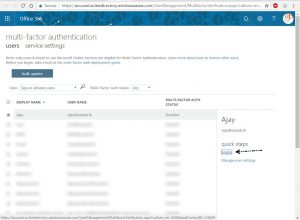
c) Select the user for whom you want to enable Multi-Factor Authentication. At the Right Pane click Enable. You can enable MFA for bulk users at once also.


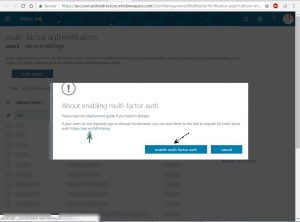
d) Click Enable Multi-Factor Auth to enable it.


Click Done.


Congratulations 😊 you have enabled Multi Factor Authentication for a user. The activity from admin end is over. I hope it will be a child's play next time. Now end users needs to be educated about completing MFA steps according to their preferences.

Result after enabling the MFA: Share the link http://aka.ms/MFASetup via email to end users for completing MFA settings according to their own preferences. If they miss your communication, still they would be required to complete MFA as described below:

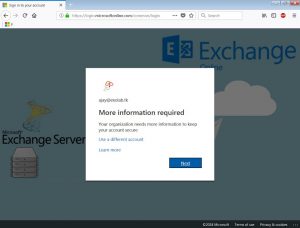
a) User login to https://outlook.office365.com/owa
b) User will be prompted to provide More Information Required about him.


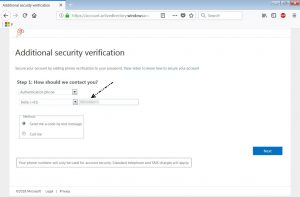
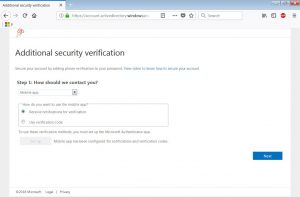
c) He is asked to choose 3 optionsAuthentication Phone, Office App and Mobile App. 
Simplest Option is "Authentication Phone" where user enters his personal mobile number and receives a code on it to verify his true identity.


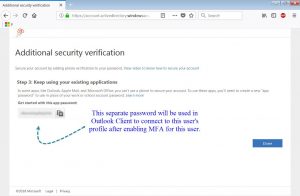
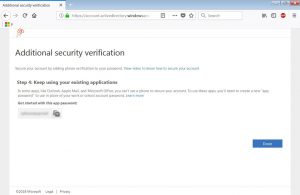
A code will be sent to the mobile phone entered. In the last an App Password is also provided to use with Outlook.


Other Optional steps in Additional Security Verification Page: 

The Office phone can be setup with the help of office Admins.

Mobile App: It uses Microsoft Authenticator App to approve or provide codes used for MFA. During it configuration the user also adds Personal Phone number like in Authentication Phone. It's condition is it will only work if Mobile Internet / Wi-Fy is on in mobile. It may happen the user may remove Microsoft Authenticator App or no internet in mobile, so in that case Phone Authentication is used as an alternate which sends a text code on mobile using User's Carrier e.g., Airtel, Vodafone, Jio etc.)


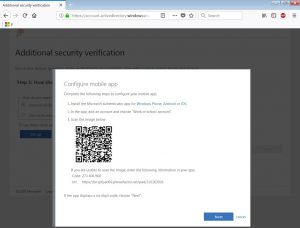
Configuring Mobile App is very easy: Select Mobile App (shown above) - choose Recieve Notifications for Verification - Click Setup. Simultaneously Download "Microsoft Authenticator" App in mobile from Google Play Store.


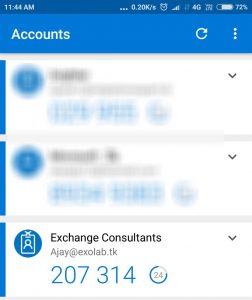
Open the app in mobile & click 3 vertical dots at top right of the app - Add Accounts & scan the bar code from the Setup screen. A new Account will be added in Microsoft Authenticator App.


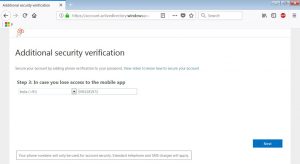
While setting up Mobile App, it will also setup Authentication Phone in case mobile internet is not working.


In the end, it will provide the App Password for Outlook Connection. If user uses Outlook after setting it up, he may get a prompt to enter the password, so he has to enter this App Password. Note it down to enter afterwards.


d) More than 90% of corporate users choose only Authentication Phone option to receive simple text on mobile. Its completely the users's choice. Personally I prefer Mobile App where Microsoft Authenticator sends a popups on mobile screen to agree to deny.

Final Result: 

After completing the MFA Settings, lets see what happens when the user logins to O365: 
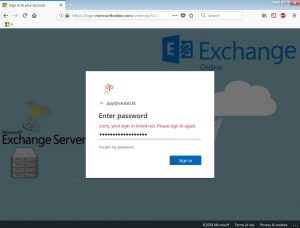
a) User login to https://outlook.office365.com/owa


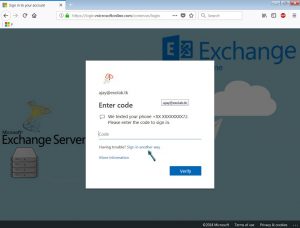
b) If he had chosen only the Mobile Authentication method which mostly users do, he will get the text on his mobile as shown below.


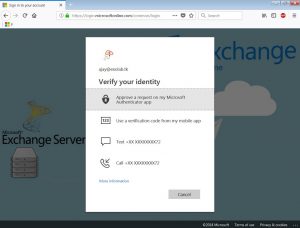
c) If he had chosen Microsoft Authenticator App option he will get 4 different options:

  • Approve a request on my Microsoft Authenticator App - Gets a popup on mobile: Approve or Deny.

  • Use a verification code from my mobile app - Shows a code on mobile in Microsoft Authenticator app.

  • Text +XX XXXXXXXX72 - Sends a text code on mobile using Carrier (no internet required)

  • Call +XX XXXXXXXX72 - Receives a call from Microsoft & IVR will request to press # key to complete verification.


User can select any option from the above and he will be able to login immediately to his account.

Extra Notes: An app password, is a password that is created within the Azure portal that allows the user to bypass the Multi-Factor Authentication. All the Office 2016 client applications support multi-factor authentication through the use of the Active Directory Authentication Library (ADAL). This means that App Passwords are not required for Office 2016 clients.

Note: If you find that this is not the case, make sure your Office 365 subscription is enabled for Active Directory Authentication Library (ADAL). Connect Powershell to O365 & run:

Get-OrganizationConfig | Format-Table name, *OAuth* 
Set-OrganizationConfig -OAuth2ClientProfileEnabled:$true   (it will enable Active Directory Authentication Library (ADAL))

If you enjoyed my post, I bet you’ll have something to say! You always have an option to leave a comment below.

Part 1: Why only 5% Users fully secure their GMail Account? 
Part 2: Your One-Drive data is important. Secure it full-proof.

Thanks,

Ajey Kumar Gupta
(Microsoft Engineer).

Next Post: How To Connect To Exchange Online with MFA enabled user in Powershell?