Monday, October 29, 2018

Google Home Hub - Everything you need to know about it.

Google newly launched 7 inch smart Google Home Hub. It seems like Google did experiment with a tablet and its home mini and combined both to build a smart Google Home Hub. It has an ambient light sensor that can auto-adjust the brightness depending upon the light present in the room. The biggest drawback is that it lacks a camera.

What it will look like?

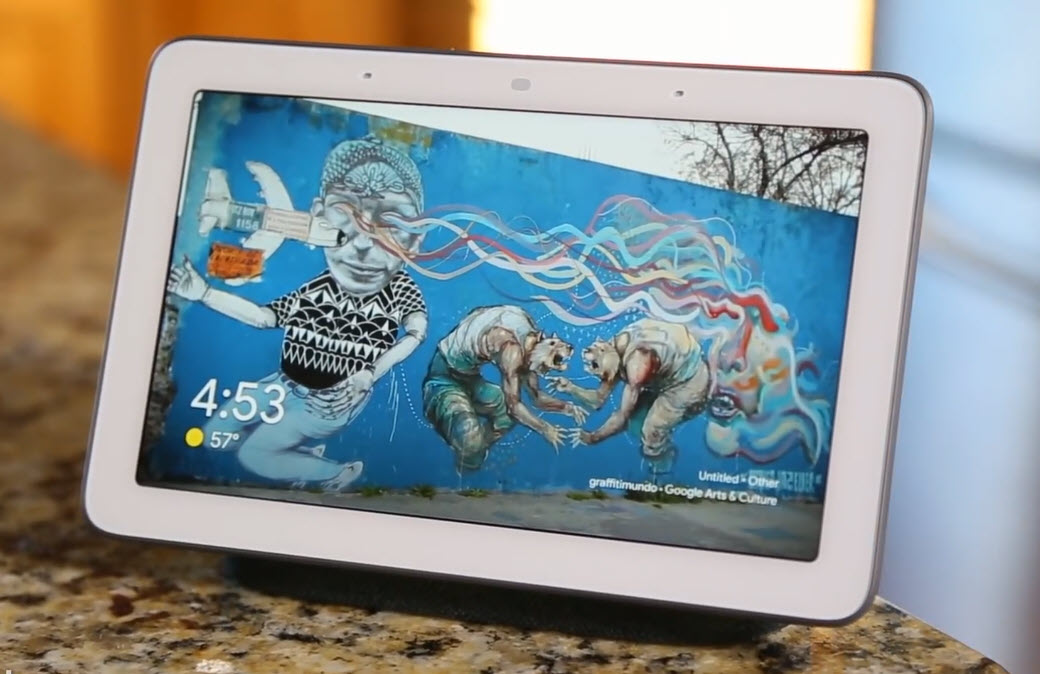
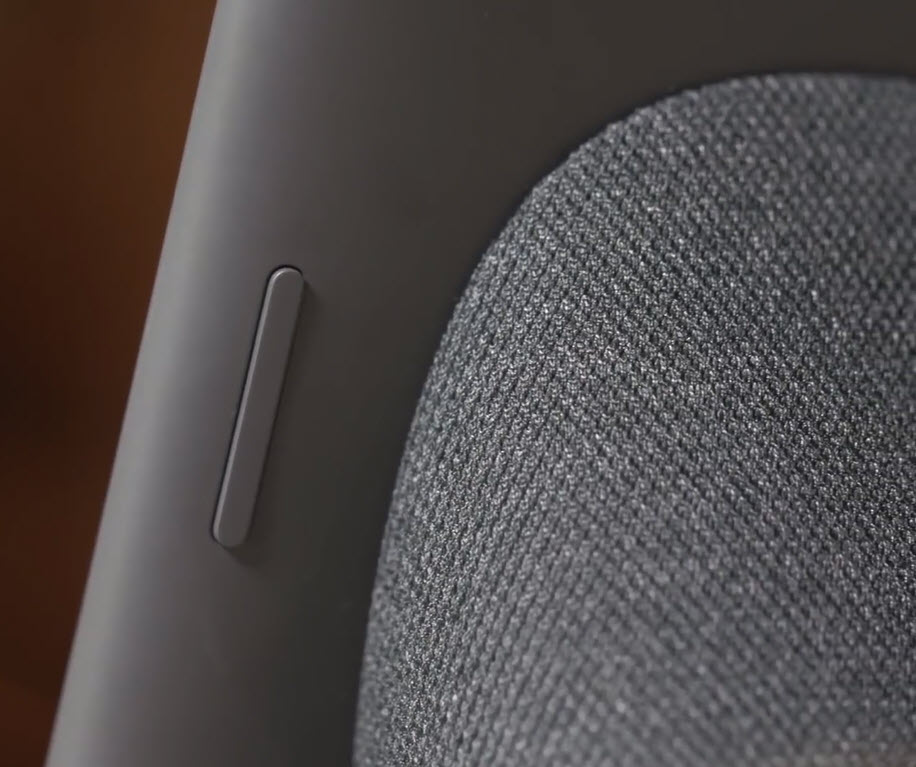
Google Home Hub is 7 inches by 4.5 inches tall, and a depth of 2.65 inches. It weights the same as Google Home. You get two two physical controls: A volume rocker and a privacy switch to turn off the microphone and stop the device from listening “OK, Google” voice commands. Google Home Hub will be available in four colors: chalk (white), charcoal (dark grey), aqua (light blue), and sand (pink).


Features & Controls:

Google Home Hub comes handy for viewing pics, watching videos, and live Television with Youtube Tv. It shows more information if you ask about the weather, or for anything like Recipes to get the steps. It uses Google Assistant at the back-end which shows results with the help of touch screen.

You can control the volume from its back, or can give the Voice command or use its Touch Screen. It has a good mike and sound quality of the speaker inside it is good but not that equally good if you compare google home mini. Overall, its a cheap affordable device with interactive touch screen and looks cool placed anywhere as a photo frame.


The Hub will also allow access to Google photos, allowing users to enable “Live Albums” to create slideshows by identifying people that the user wants to see regularly, such as friends or family members. Users can also simply access albums on the fly with voice commands like, “Hey Google, show me my photos of last birthday.” If one will add a pic in the live albums, it will automatically show that new pic. The HD display will also play videos from YouTube, and moreover it will come with free six months YouTube Premium subscription.

One can use it in the Kitchen or in the Drawing Room and it looks pretty beautiful anywhere as its small and looks like a tablet with a speaker and google assistant voice inside it.

It can handle a most of everyday productivity functions like issuing commands, making shopping lists, asking for a song to play and placing audio calls. Like other Google Assistant-supported devices, it uses a voice-matching function to identify separate users and deliver their calendar, commuting details, and reminders, which are displayed by the screen visuals.
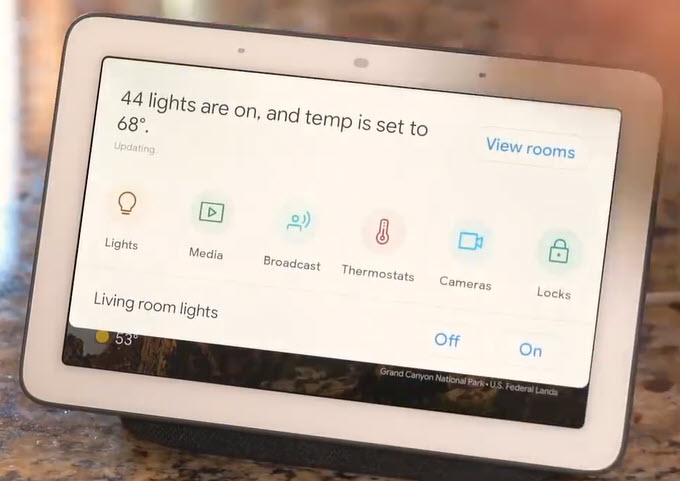


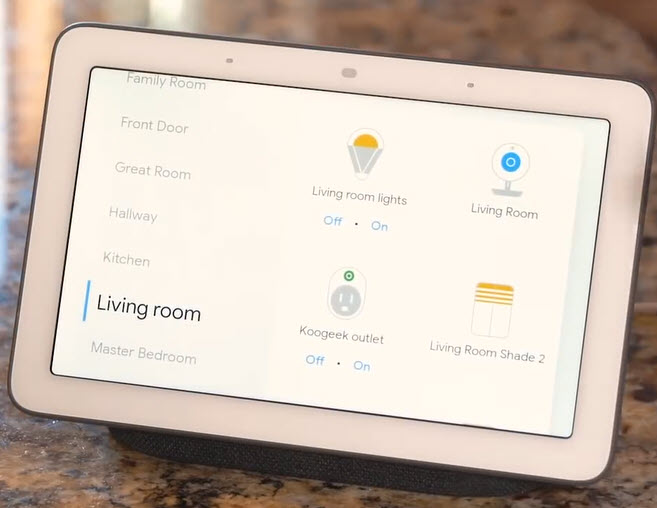
It has a smart home dashboard called “Home View” that Hub users can swipe down on the touchscreen to access every smart home gadget, such as lights, media, broadcast, thermostats, cameras, locks and speakers. Click View Room option to see all of your Smart Phone Devices out here room by room. Similar Home View is also available on the new Pixel 3 phone.

Sound quality

If we look at listening to just music perspective, the Home Hub sounds somewhere in between the Google Home and the Home Mini. It can get pretty loud and clear, but lacks any real bass and sounds pretty unpleasant at 100% volume, and one can easily say its not a smart speaker to buy for rocking out.

It does a great job of rendering the Assistant’s voice, and works perfectly well for watching YouTube videos and news broadcasts. But Comparing to the audio you get from Amazon’s first-generation Echo Show, it lacks the quality in audio.

Cons:

Unlike other smart displays, Google Home Hub lacks a camera, which may be either a good or bad, completely depending on how you feel about your privacy and the lack of ability to video chat. The only buttons on the outside of the Hub are volume up/down and mic on/off. The HD Screen sometimes seems too small to watch videos for an extended period of time. In the last, it doesn't have a 3.5 mm socket.

Price:

Google Home Hub features Google Voice assistant and will be available for $150, with a slightly lower competitive price of Lenovo Smart Display, which starts at $199. Google Home Hub price in India is expected to be Rs. 11,000. Google Home Hub will start shipping from October 22, 2018.

Comparison with Lenovo Smart Display:

When placed next to the Lenovo Smart Display, which is another Google Assistant smart speaker with a touchscreen, one can easily tell the difference clearly in size like comparing a tablet to a smartphone. It seems Home Hub’s small size makes it more versatile and is designed for primary use in the kitchen.

Do you think Google Home Hub is a decent priced product from google and should be bought? I look forward to read your comments below.

Read more: Click Here

Ajey Kumar Gupta
(Microsoft Exchange Admin)

Next Blog: Publishers can embed Subscribe button inside their Youtube Videos

Sunday, October 21, 2018

Publishers can embed Subscribe button inside their Youtube Videos

Youtube Video now includes a Subscribe button inside them.

Youtube has added a new feature where Subscribe Button will not just be visible inside the video but viewers will be able to Subscribe the channel directly by clicking inside the played video. Subscribe Button will be functional within the video itself.

Lets understand with the help of an example:

Suppose you are watching the Youtube video inside any other website e.g., www.akginfotech.com and if any viewer likes the content and has to subscribe that channel, up until now, the user has to open the URL page of that video and come to Youtube's page in order to Subscribe the channel, however now he will directly be able to subscribe by watching the video anywhere. Thanks to Youtube for this added feature. Youtube is making things easier for its viewers to subscribe to the channel viewers want.

Steps Required to add Subscribe Button next to your Channel Logo:

a) Login to Youtube - Creator Studio.

b) At left pane click Channel - Branding

c) Select your logo for your Youtube Channel and choose Entire Video. Now your channel logo will be shown in the entire video you will publish and a new user can subscribe easily.

If you will embed your video in your own website, Subscribe Button will be shown at top next to your logo in Red Color.


You can see the Subscribe Button in action in the video below, which is our "How to Get free Lynda Account September 2018". If you hover over the AKGInfotech logo on the top left, an option to Subscribe in red color will appear. So now a new user can easily Subscribe the channel directly from my own website Akginfotech.com. One has to be logged into Gmail in the browser else he will be prompted to login.


I hope it would be useful for all those users who have YouTube Channels and are looking for Subscribers.

To Read More: Click Here

Thanks a ton for reading my blog. I hope you like it. Do click Subscribe button right now & post a comment below if you appreciate the work.

Ajey Kumar Gupta
(Exchange Server Admin)

Next Blog: Google Home Hub - Everything you need to know about it.

Saturday, October 20, 2018

Windows Server 2019 Released but hold back due to...

Windows Server 2019 will be the latest Server Operating System added into the Windows NT family of operating Systems by Microsoft.  Its first Insider Preview was announced on 20th March 2018.

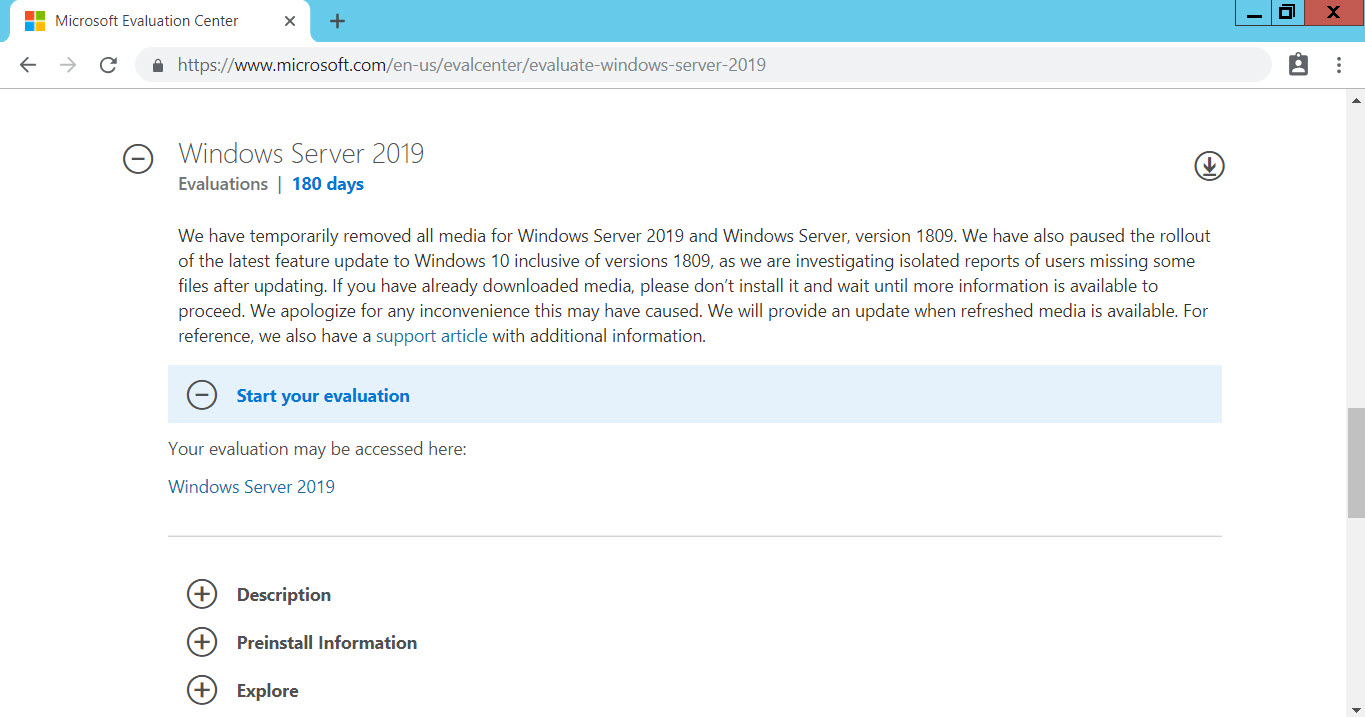
It was finally released on 2nd October 2018 (Mahatma Gandhi Jayanti). Its trial for 180 Days was available on Microsoft website:

https://www.microsoft.com/en-us/evalcenter/evaluate-windows-server-2019

However, Microsoft found issues with it, paused the rollout and removed the ISO until the bugs are not fixed in the Operating System.

Microsoft clearly mentions on its website that "We have temporarily removed all media for Windows Server 2019 (version 1809) as many users found their data missing after installing it. Also for Windows 10 update (version 1809), this latest rollout has been paused as Microsoft is investigating isolated reports of missing files after updating."


Friends, at the time of posting this blog, ISO of Windows Server 2019 was not available to download. Screenshot attached above. You will be updated first on this blog whenever it re-appear for download.

Microsoft on its website mentions that if you have already downloaded media, please don’t install it and wait until more information is available to proceed. We apologize for any inconvenience this may have caused. We will provide an update when refreshed media is available. For reference, we also have a support article with additional information.

Do you think Microsoft released the Server Operating System without proper testing? It led Microsoft remove it from its website? Looking forward to read your comments below.

Read More: Click Here

Ajey Kumar Gupta
(Exchange Admin)

Next Blog: Exchange Hybrid Setup in Office 365 | HCW setup Step by Step

Wednesday, October 10, 2018

Exchange Hybrid Setup in Office 365 | HCW setup Step by Step

A hybrid deployment is a combination of On-premises Server and and Cloud-based services. The Hybrid Configuration Wizard actually helps you achieve this. You get the seamless look and feel of a single Exchange organization between an On-Premises Exchange organization and Exchange Online in Microsoft Office 365.

Hybrid Configuration Wizard enables the MRS proxy which is required to migrate mailboxes from and to Office 365.

HCW creates the Hybrid Configuration object in your on-premises Active Directory which stores the hybrid configuration information for the hybrid deployment and is updated by the Hybrid Configuration wizard.

Deploying a Hybrid Environment is one of the most complicated tasks during Migration to Office 365. Sometimes it takes weeks to collect data about infrastructure, designing the plan in stages. Even taking every precaution there is no guarantee that everything will turn out fine. I myself have been into situations many times where one single missed out step failed the HCW.

Hence, I would like to share a Step by Step Guide to perform Hybrid Configuration Wizard (HCW):

Step 1: Open Internet Explorer - Login into portal.office.com with Global Administrator - Exchange Admin Center - At Left Bottom corner click Hybrid - Click Configure which will download a file - Run it.  (Note: Don't use Google Chrome, use Internet Explorer)

Step 2: Once you run the setup, it creates a shortcut on Desktop, and the configuration window will open Automatically - click Next.

At this step HCW searches the right Exchange Server in your Organization. It will point to the CAS Server. Click Next.

Step 3: Enter your On-premise Exchange Server Administrator Credentials and the Office 365 Global Administrator Credentials. HCW tries to login into each server using Powershell.

Step 4: Next Steps if Setting Up Federation Trust. Its required for full Hybrid deployment. It enables sharing calendar free/busy information. It will list the domains and you have to prove that you own that. For that a TXT Record you have to add in your Domain DNS Registrar.

Step 5: HCW will ask you to provide the Transport Certificate (3rd Party CA) which will be used to secured Email Flow between On-Premise & Office 365 Tenant.

Step 6: Enter your Public Ip Address. You can use FQDN of the On-Premise Server as well, however it should resolve to your Public Ip address provided by your ISP. The ports 25 (EWS) and 443 (OWA) should be open. Click Next.

Step 7: HCW will start the Configuration Process and will enable your On-premise Exchange Server and Office 365 Tenant into a single Hybrid Organization.

Step 8: Finally if everything went well, you will receive the message Congratulations, Hybrid Services are now configured.......

Friends wasn't that easy? It was :) I have included a Video Presentation just for you:

Now after completing it, most of the Exchange Admins wonder what would have got changed in their infrastructure and how to find that everything is fine.

Look for the logs at the location for any issue:

Location of the Log File:

%AppData%RoamingMicrosoftExchange Hybrid Configuration

Look for the .txt file and search:

Activity=OnPremises Connection Validation
Activity=Tenant Connection Validation

You can check the Hybrid Configuration using Exchange Management Shell: Get-HybridConfiguration

Changes seen at On-Premise Exchange Server:

a) EMailAddressPolicy - an addition with one smtp address "@tenant.mail.onmicrosoft.com"

b) Remote Domain - an addition with tenant.mail.onmicrosoft.com and tenant.onmicrosoft.com

c) Accepted Domain - an addition with tenant.mail.onmicrosoft.com

You can also check the above changes using Exchange Management Shell:

a) EMailAddressPolicy
Get-EmailAddressPolicy | FL Name,EnabledEmailAddressTemplates

b) Remote Domain
Get-RemoteDomain

c) Accepted Domain
Get-AcceptedDomain

To view all data about the Organization Relationship, use your Power Shell console: Get-OrganizationRelationship

Even it looks simple, HCW performs major complicated tasks at the backend for us and we have covered them mostly.

I hope you would have understood how easy it is to setup Hybrid Configuration Wizard. If you find this useful, do let me know by leaving your comment below.

Read More: Click Here

Ajey Kumar Gupta
(Microsoft Exchange Admin)

Next Blog: Google AdSense के अंदर की Terms को समझें | CPC, RPM, AD Units, Monetization etc.

Wednesday, October 3, 2018

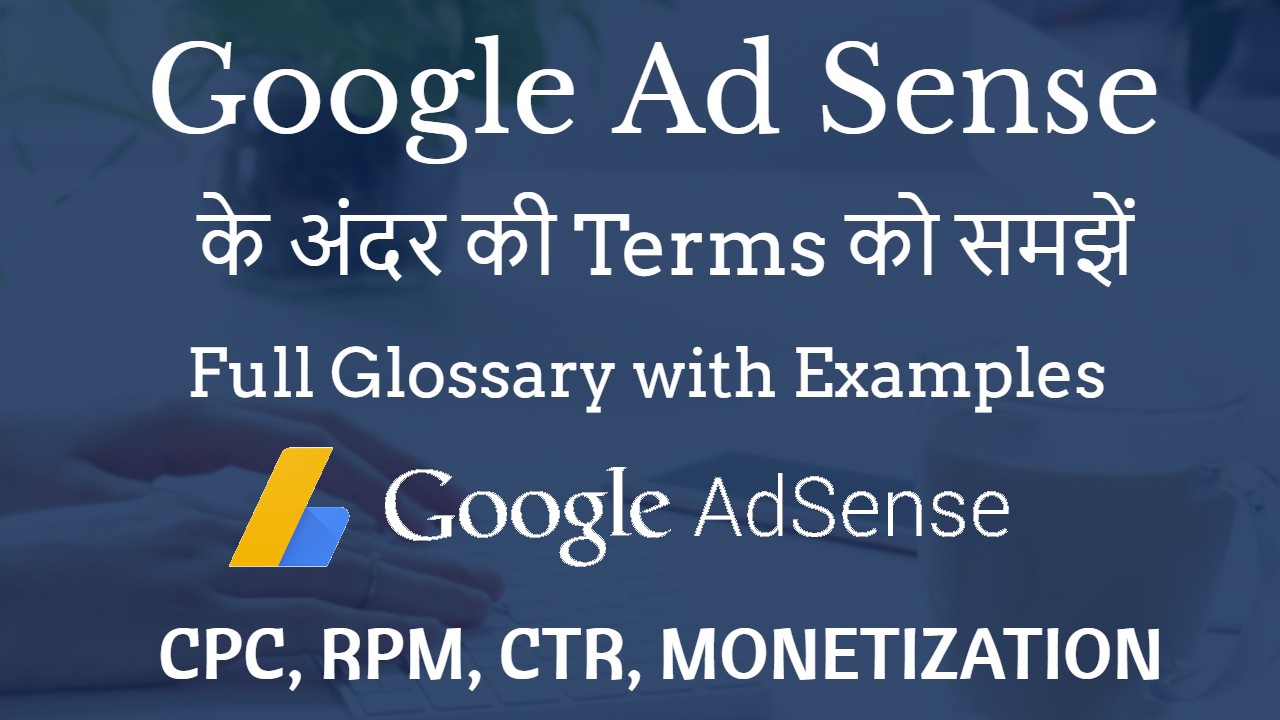
Google AdSense के अंदर की Terms को समझें | CPC, RPM, AD Units, Monetizationetc.

Friends, there are various terms used in Google Ad Sense which has it own meaning. I have tried my best to include all common terms used in Ad Sense in simple language. I hope it would be helpful to all Ad Sense Users:


Monetization: The process of Earning Revenue on a web property e.g., Website or YouTube Videos.

Keyword: A word or phrase on a webpage that easily identifies the overall concept presented by the webpage.

Bid: The amount of money Advertisers are willing to pay when their advertisement is viewed or clicked.

Ad Unit: An area on a website where advertisements will be automatically displayed using Google AdSense.

Page View: When a user accesses a Single Page on your website. It’s a page where one or more Ad Sense “Ad Units” are viewed by a user on a website.

Clicks: The action of clicking on an advertisement by the user visiting the website. Its recorded and can be seen in the Performance Report.

Click through Rate (CTR)The ratio of clicks a particular ad on a website receives in comparison to the number of total pageviews it has received. E.g., if you received 100 impressions (100 different Ads are shown on the website or 100 times the same advertisement shown on a Page) and out of 100 times a user clicked certain advertisement only once, so the Click through rate will be 1%.

Impression: A single view of an advertisement on the website. You can have multiple Ad Impressions e.g., On a single page if you have 3 AdSense Ads, it will be 3 Impressions.

Cost per Click (CPC)The amount of money paid by an Advertiser for each click on their ads shown in the Google Ad Sense Ad Unit. We can check the Average CPC from Performance Report.

Internet Display Advertising: Certain areas of a website or blog that are reserved and sold to advertisers to promote a particular product or service.

Revenue per Thousand (RPM) Impressions: The Average amount of revenue earned by a Publisher for 1000 impressions on a particular ad unit or website. It’s the best metric to measure the performance of Google Ad Sense Advertisements.

Cost per Thousand Impressions (CPM)The amount of money paid by an Advertiser for 1,000 Page views or Impressions on an Internet advertisement.

Ad network: A collection of advertisers paying for Internet advertisements and publishers earning revenue from displaying advertisements on their web property.

Ad Requests: The Total number of times an ad unit on a particular website requests Google Ad Sense to serve a relevant and related advertisements. E.g., In other words, every time a user goes to a page on your website that has an ad unit, the ad unit is requesting Google Ad Sense to put an advertisement inside of it.

Estimated Earnings: The Total amount of Revenue earned by a publisher regardless of the number of page views. We can even check our daily, weekly or monthly Estimated Earnings.

Coverage: The percentage of ad requests in which a relevant and related advertisement is found and displayed within the ad unit. So if every time an ad unit requests an advertisement from the AdSense, its actually placed within the Ad Unit, and your coverage will become 100%. If while placing an Ad Requests google is not able to find an ad to place on your website, it means you have to tweak your Title of the page, Ad relevant keywords etc. for google to find the advisement on your web page.

Custom channel: A group of Ad Sense ad units in which their combined performance is tracked.

Active View Viewable: It means what percentage of your advertisements are viewable to the user for at least more than one second. It is seen as a parameter in My Report – Default. To check it more deeply, Common Reports – Ad units. You will see Active View Viewable, whichever add is low, we need to check and reposition that ads on our website.

Custom URL: It can combines the performance of all the ads on your homepage. You can find it at Google Ad Sense - My Ads – Custom URL – Select the Ad Units you have created for particular sections on your websites & combine those to get the overall performance results.

URL Channels: It allows you to track the Ad Performance of a Specific Page or Post on your website. You can add the full URL of any particular post and get its Performance Results. You can add maximum 500 Urls.

Google Ad Sense - My Add – New URL Channel – Add upto 500 URL’s e.g., your website’s home page address.

We can then later move on to Performance Reports to check which one is giving us more revenue.

Add Styles: When we create Ad Units, we have the option to use Default Google’s Ad Styles or we can create a custom adds.

Google Ad Sense - My Ads – Ad Styles – Create a new one by editing the default one.

User Management: If you are using Google Ad Sense for your organization, and want your users to use the code.

Google Ad Sense – Settings (Left Pane) – Access & Authorization – User Management.

Here we can add other users to our Ad Sense Management. Enter their Email & click Invite. We can create an Administrator and Standard User. Standard User can also do everything like Administrator except Managing Users.

Friends, there is a video explanation in details as well. Please watch it:


I hope friends you would have got a good idea on the Terms & Options used in Google AD Sense now. If you have any queries or feedback, kindly comment below and I will try to revert you asap.

Read More: Click Here

Thanks a ton for reading my blog. I hope you like it.

Ajey Kumar Gupta
(Exchange Server Admin)

Next Blog: How to create Professional or Business Email Address with Microsoft Office 365.

Monday, October 1, 2018

How to create Professional or Business Email Address with MicrosoftOffice 365

Duration to complete: Less than 5 minutes.


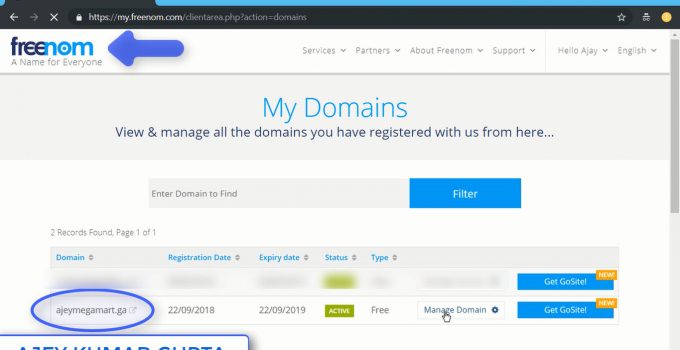
Step1: Own a domain name from Freenom.com. For this blog, I created ajeymegamart.ga domain using with I will create my business Email address like ajey@ajeymegamart.ga.

Step 2: Search Office 365 E5 Trail in Google.com and click on the first link.


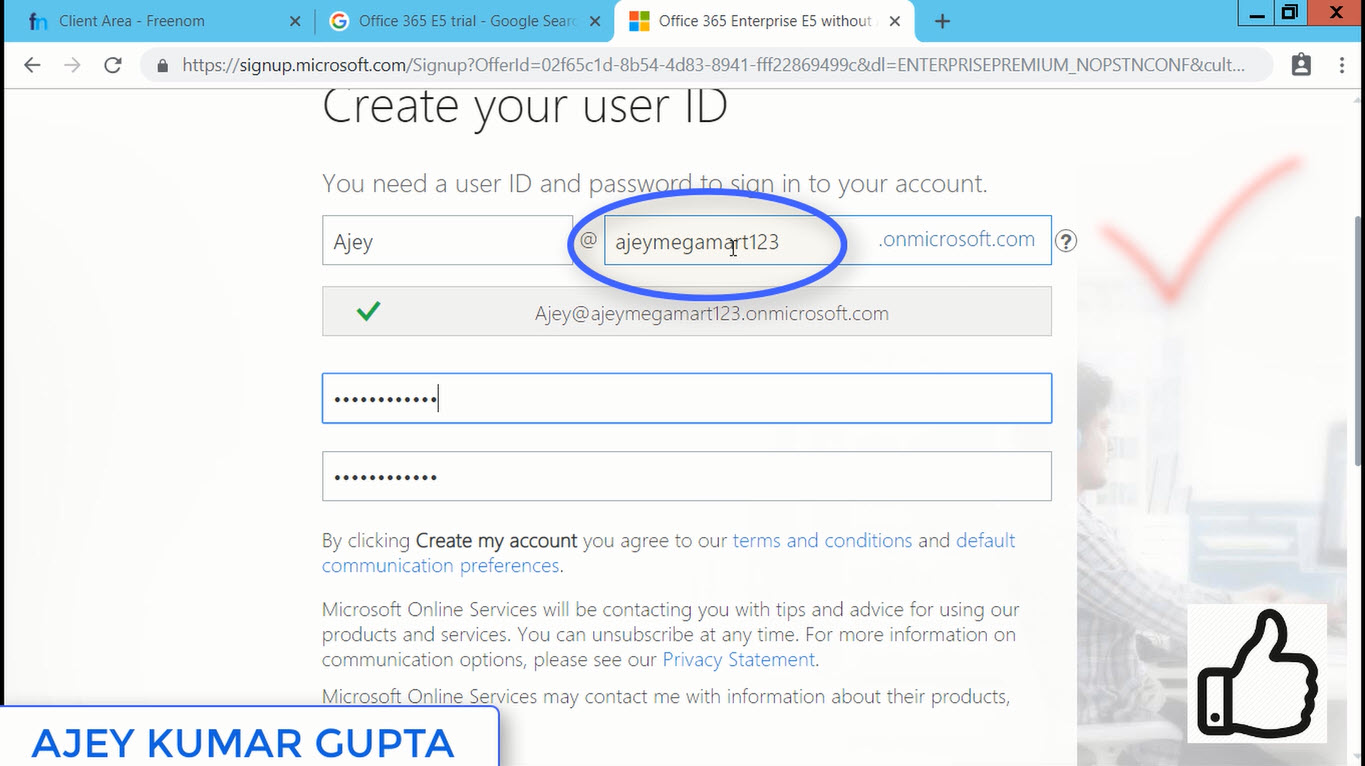
Step 3: Fill out the form. Make sure at this step while adding your business domain, don't add your actual domain name else it will stuck with this particular tenant you are going to create and cannot be removed if you want to use it by creating a new tenant after this. Add your domain name in the form like domain123 e.g., ajeymegamart123


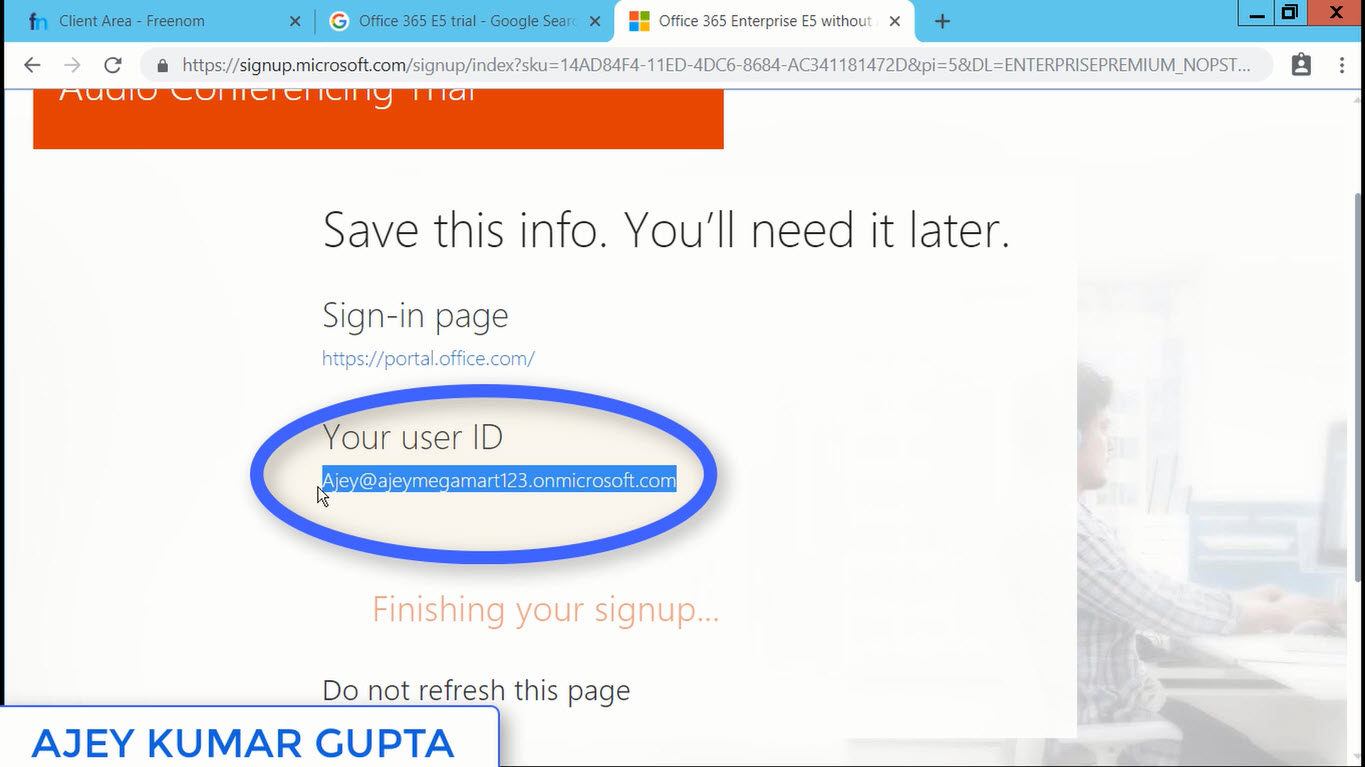
Step 4: After completing the form we will get the first Global Administrator (who has all the rights to administer the tenant) i.e., ajey@ajaymegamart123.onmicrosoft.com 


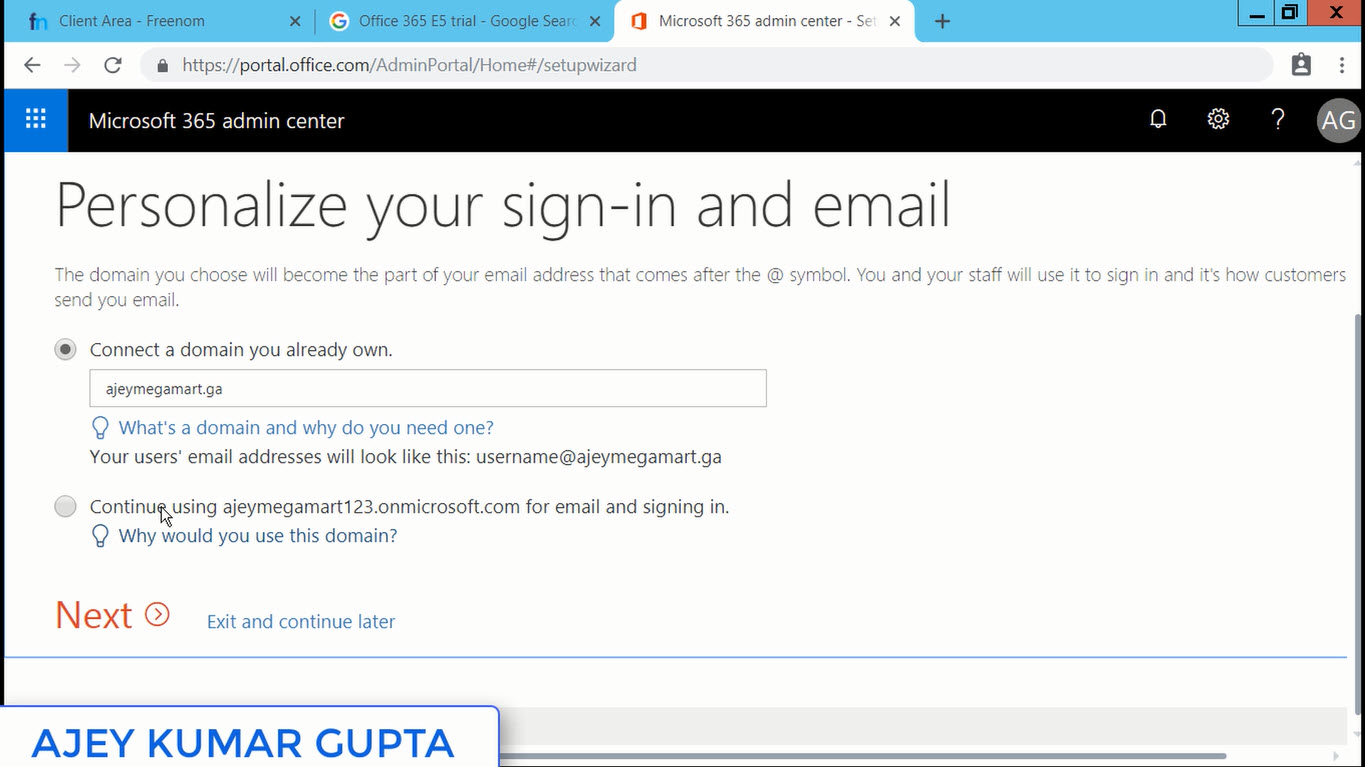
Step 5: Now at this step we will enter our actual domain name i.e., ajeymegamart.ga


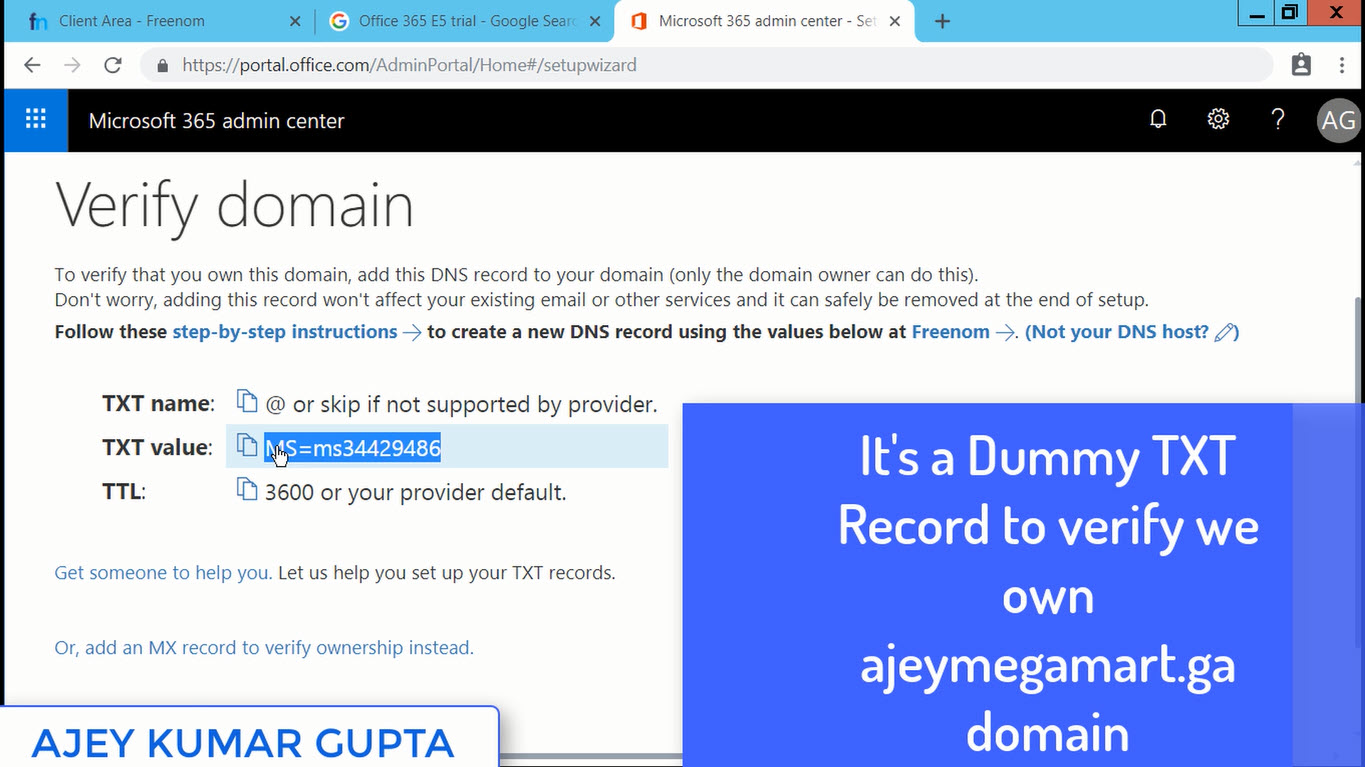
Step 6: Microsoft will ask us to prove that we own this domain ajeymegamart.ga, so for that it provides us a Dummy TXT Record to add  in our Domain Registrar DNS i.e., Freenom.com


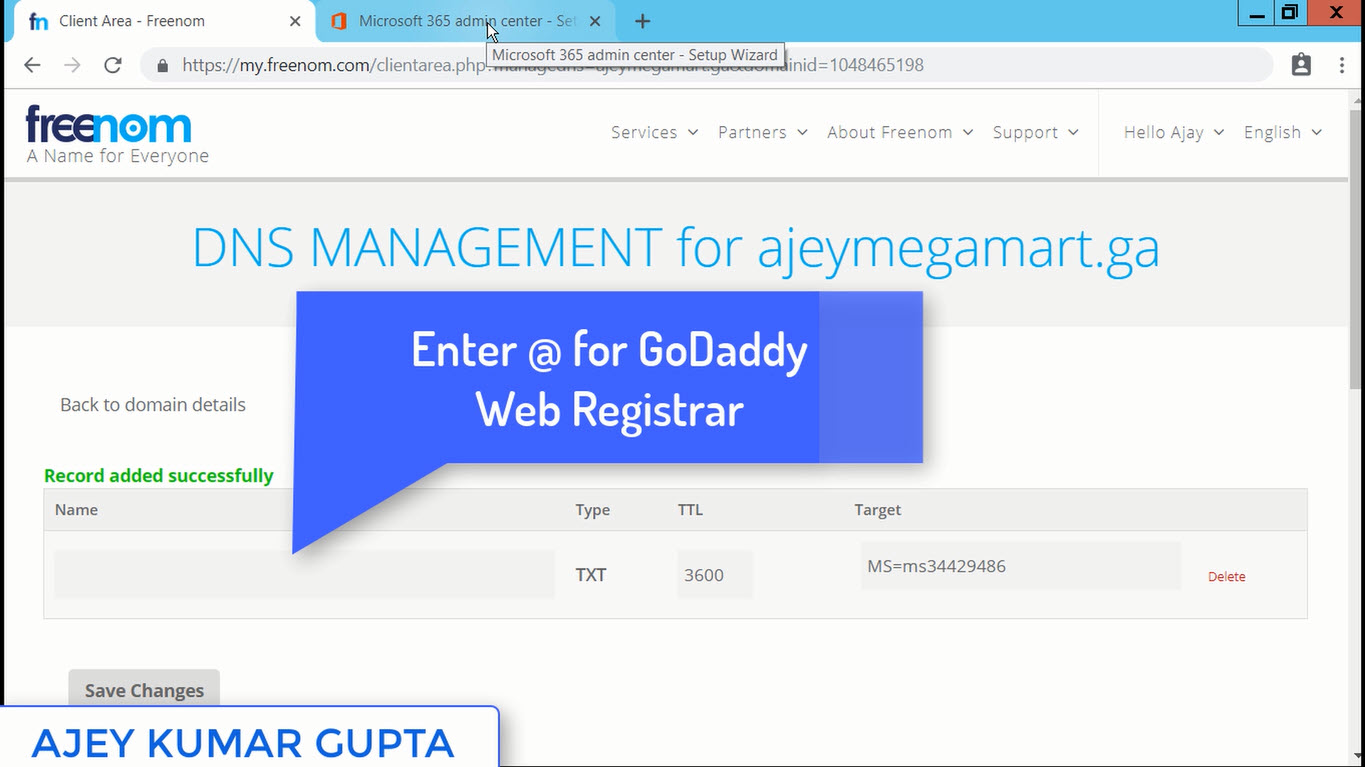
Step 7: Add the TXT Record in the Manage DNS of ajeymegamart.ga Domain at Freenom.


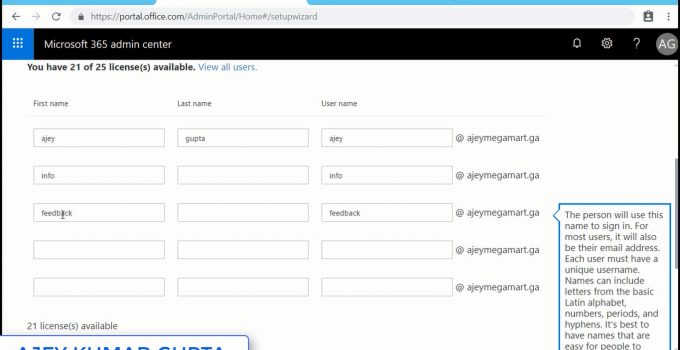
Step 8: Enter the users of your Organization or Business who require the Business Email Addresses to communicate with the clients.


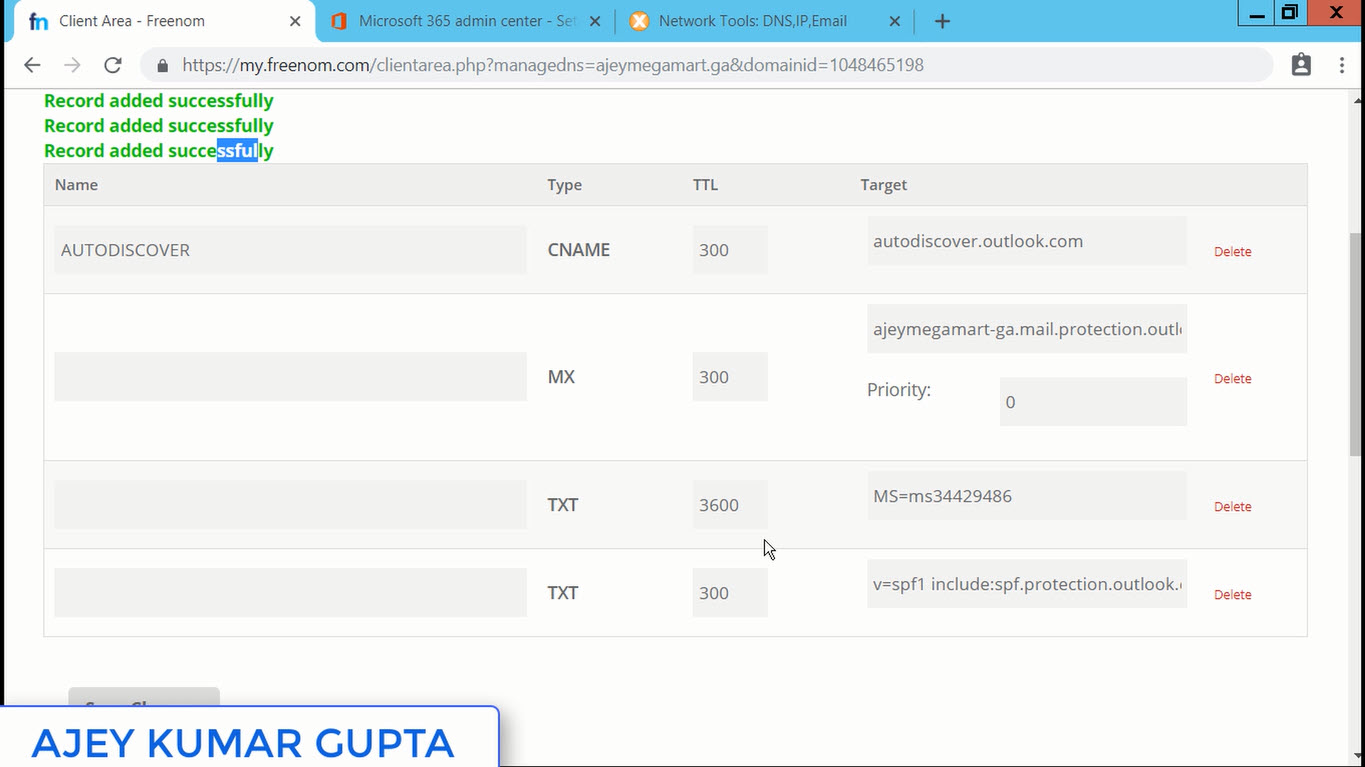
Step 9: After you entered the users, Microsoft will finally provide the real DNS records which will help your domain to get Office 365 Services. Add these in the DNS Section of Domain Registrar.

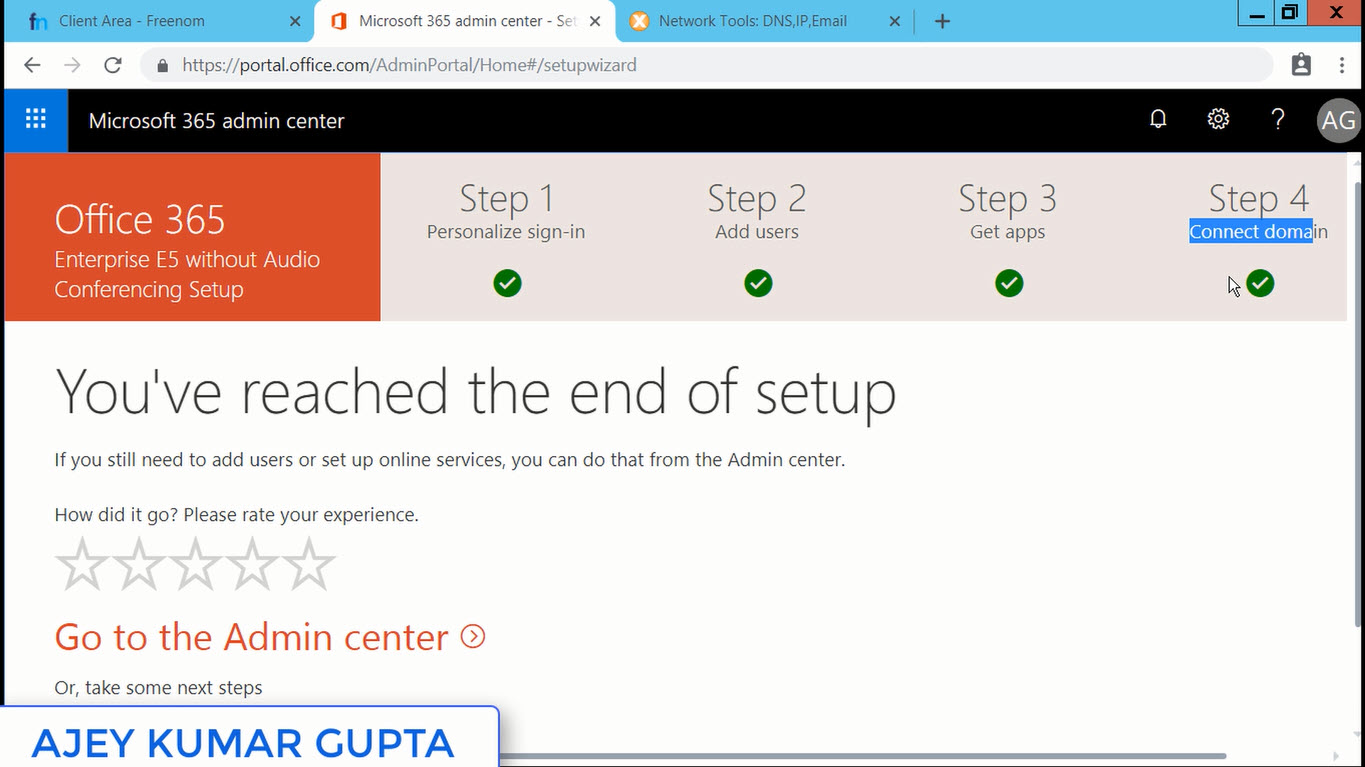
Step 10: The Initial Configuration of your Tenant is completed. Now click on Go To Admin Center.


Step 11:  We created the tenant using ajey@ajeymegamart123.onmicrosoft.com. Now we will log out from this user and login with our user having actual Email address associated with our business domain name. However, before logging out I will ensure that I must reset that user's password manually and assign him Global Administrator Rights.

Step 12: We will log out and login with our real email address i.e., ajey@ajeymegamart.ga

Step 13: We will try to send a test email from Gmail to our business email address. 


Step 14: Congratulations Friends, we have successfully received an email from Gmail. Now anybody in this world, may be our business client or our partner can send us an email on our business Email Address ajey@ajeymegamart.ga

You can share this Email address or get it printed on your Card and it will give a professional look to your profile.

Friends, if we send or receive Emails using our Business Email Address instead of gmail or hotmail, we promote our Business Domain along with our Website. In today's world your clients expect that you should have a website where they can find more about you and can communicate on your Business Email Address.

To get an real experience on all the steps, I am including the live demonstration in the video below. I hope it will give you crystal clear understanding of all the steps:

Read more: Click Here

Thanks a ton for reading my blog. If you have any queries or doubts regarding the steps performed or in the configuration, do post your comments below and I will try to revert asap.

Ajey Kumar Gupta
(Microsoft Exchange Admin)

Next Blog: How to create Premium LinkedInLearning Account Genuinely?